


What is it and what is it for?
The tee is the little peg that lifts the ball off the ground. You can only use it for the first shot of each hole, from the teeing area. With the ball raised, you strike it cleanly, with no grass or soil in the way.
Why does it matter so much?
Further with a driver
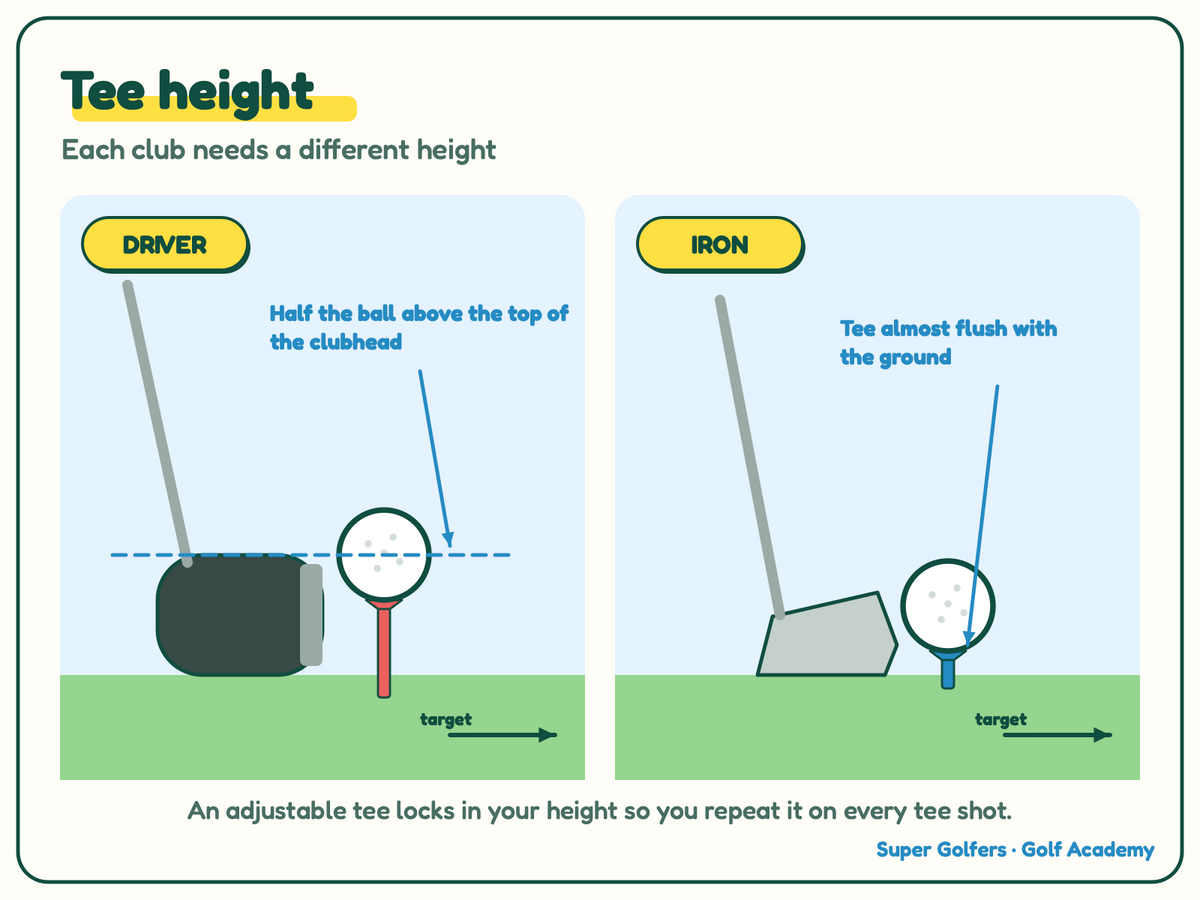
With the ball teed high, the driver catches it on the way up: it launches higher and goes further.
Cleaner with an iron
With the ball almost on the ground, the strike feels like a fairway shot and flies straight.
Same height, same shot
Change the height every time and you change the result. Repeating it is the key.
Step by step
- 1
Choose the club first
Height depends on the club: driver (high), woods and hybrids (medium), irons (low).
- 2
Driver: half the ball above
Rest the driver behind the ball: half the ball should peek above the top edge of the clubhead.
- 3
Iron: almost flush
With an iron, the tee barely pokes out of the grass, just enough to keep the ball clean.
- 4
Lock in your height
With the adjustable tee, slide the marker in from the side, turn it to your height and it stays set for the whole round.
- 5
Push it in straight
Hold the ball on top of the tee with your fingers and push it straight into the ground.

Common mistakes (and how to fix them)
✗ MistakeTee too low with the driver
✓ FixThe ball comes out low and rolling. Raise it until half the ball sits above the clubhead.
✗ MistakeTee too high with an iron
✓ FixYou slide under the ball and it pops straight up. Lower it almost to the ground.
✗ MistakeChanging height on every hole
✓ FixSet your height once and leave it alone.
Height bullseye
Push in 5 tees at driver height and 5 at iron height without looking at the club. Then check by resting the club behind each one. Every tee at the right height scores 1 point.
- 🥉Bronze6 out of 10
- 🥈Silver8 out of 10
- 🥇Gold10 out of 10

Super Golfers Adjustable Height Golf Tees · Pack of 4
A pack of 4 adjustable tees with a height marker (35 to 55 mm): choose your height once and repeat it on every tee shot.
🏁 Finished? Mark it and keep going.
 Next lesson · 2